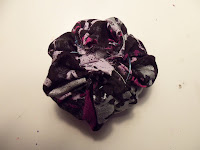
I ABSOLUTELY love this book. It has so many great projects. I got it from Borders.
Pin It Now!
Sunday, May 22, 2011
Tuesday, May 17, 2011
Sleeveless Collared Cardigan Vest
Five-Step Sleeveless Collared Cardigan Vest
Level- ●●○○
Supplies
Level- ●●○○
Supplies
- shirt that fits you or a little too big
- Sewing machine
- fabric shears
- tailor's chalk
- pins
- Try on shirt inside out. Looking in a mirror, draw a strait chalk line down the center of the shirt.
- Take the shirt off and cut on the chalk line on the top layer of the shirt. Cut the sleeves to desired length.
- With the shirt still inside out, fold, pin, and sew a double fold hem on the sleeves and turn right side out.
- With the shirt right side out, fold the split neckline outward, exposing the wrong side. Sew this "collar" down with a strait stitch. (See pic # 1)
- OPT- With shirt right side out, sew a strait line down the sides to prevent fraying.
 |
| Pic #1 |
ENJOY YOUR "NEW" VEST!
Pin It Now!
Wrist Pincushion
Level- ●●○○
Supplies Needed:
Pin It Now!
Supplies Needed:
- 6-7 inch piece of elastic (any width)
- 6x6 piece of cotton fabric
- 1 1/2- 2 inch (diameter) plastic bottle cap
- needle & thread
- handful of fiberfill
- OPT. hot glue gun
- Prepare supplies listed above
- On piece of fabric, cut a small triangle off the corners to make an octagon.
- Thread your needle and sew a running (regular) stitch around the perimeter of the octagon as if making a fabric yo-yo.
- "Squish' and place fiberfill inside bottle cap and hold. (Hot glue it to the bottle cap if wanted)
- Holding the fiberfill in place, place it and the bottle cap face down inside the yo-yo. Gently pull the needle and thread to close around the top of the bottle cap. Stitch and knot closed.
- Using a running stitch, sew short ends of elastic together, forming the wristband.
- Hot glue or hand-sew the band to the cushion. Finally, try it on!
Pin It Now!
Subscribe to:
Comments (Atom)


