Black & white is on trend! Wear it on your nails :)
Pin It Now!


 |
| But... I added some glitter, let that dry, then sealed it off with a topcoat. SILVER GLITTER :: LA Colors |

 |
| Paint your nails pink, coral, or red. |
 |
| Let them dry a LONG time and tape your nails for a french manicure. I'm using paper reinforcements cut in half. |
 |
| Paint green polish above the sticker to make the watermelon rinds. |
 |
| Let those dry for a while as well. Then peel off the stickers or tape. |
 |
| Use a black nail art pen or nail art brush to make the black seeds on the pink part of the nail. |
 |
| Add a clear top coat and you're done :) |

 |
| Paint your nails red, white, and blue in an alternating pattern. |
 |
| I'm not the best at painting nails :D Make sure you let them dry properly. |
 |
| Use a black nail art pen to write USA or July. But I put USA so it will work for the 2012 Olympics. Let the ink dry and paint a clear top coat. |
 |
| Paint a color of nail polish (that is not the color on your thumb nail) onto the non-sticky side of the scotch tape. Let dry, paint a top coat, and let that dry. |
 |
| Cut the tape off and try to create a star. Take your time because this is frustrating! |
 |
| Stick on a dry thumb nail and finish it off with a top coat. |
 |
| Make sure each nail has a top coat. I hope you liked this easy Independence day/Olympics (USA) nail art!!! |
Here is another simple & cute nail tutorial- if you want to see more, head to my "Tutorials" page and scroll down to the nail art section.
Level: ●●○○
Supplies:
 |
| For the base, I'm using "Blazed" by Wet n' Wild. I bought it on vacation for only $1.50 at a cute little store in Avalon, Catalina Island. Make sure it dries before you start the flower. |
 | |||||||
| Start with an electrical outlet cover and make sure you have a screw. |
| For the petals: Using the nail dotter, create a dot on your nail. Using a toothpick, start in the center of the dot and pull upwards. It should look like a teardrop. |
| Create another dot next to the petal you just completed and repeat the motion with the toothpick to shape the dot into a teardrop. |
 |
| Repeat to make a total of 5-7 petals. Let dry. |
 |
| Make a small glob of brown or green on the palette and dip the nail dotter once you have cleaned the other polish off of it. (Espresso by Revlon Top Speed) |
 |
| Make a big dot in the middle of the flower. You can stop here, but I used the toothpick to create more petals. |
 |
| With the toothpick dipped in the petal color, make short strokes starting from the center dot. Add a coat or two of clear top coat. |
 |
| That's all there is to it! Please comment if you have any questions & pleeease follow my blog! I would love to see a pic of your fave nail art as well :) |
 |
| Gather supplies (clear polish not shown) |
 |
| Paint every other nail one color. |
 |
| Paint the rest your other color. ? |
 |
| With your nail dotter, paint dots. Nice pic, huh? :D |
 |
| Egg dyeing tip: dye the egg a light color, place it on a paper towel and drizzle drops of dye on it. |
 |
| Mad Hatter :) |
 |
| Cut medical tape into thin strips. Stick 2 strips on you nail. Make sure you press the strips down really hard or else it won't turn out. |
 |
| Ahhh- bad picture. Take your polish and sweep across nail, trying not to get too much on the tape. |
 |
| Bad pic- again... When dry, remove tape. Remove any mistakes or excess polish with Q-tip & polish remover. |
 |
| Apply glitter polish to nail. |
 |
| Top with a clear top coat and BAM! amazing New year nails.... Happy New Year!!! :) |
 | |||
| Tape off your nails for a french manicure. Don't know how? Click here. |
 |
| Paint the glitter polish right over the tape and onto your nail. Be careful, you don't want to paint below the tape. |
 |
| Once dry, peel off tape and top with a few layers of a clear top coat. |
 | |||
| Paint your nail white. Dab some black polish on the piece of cardboard. |
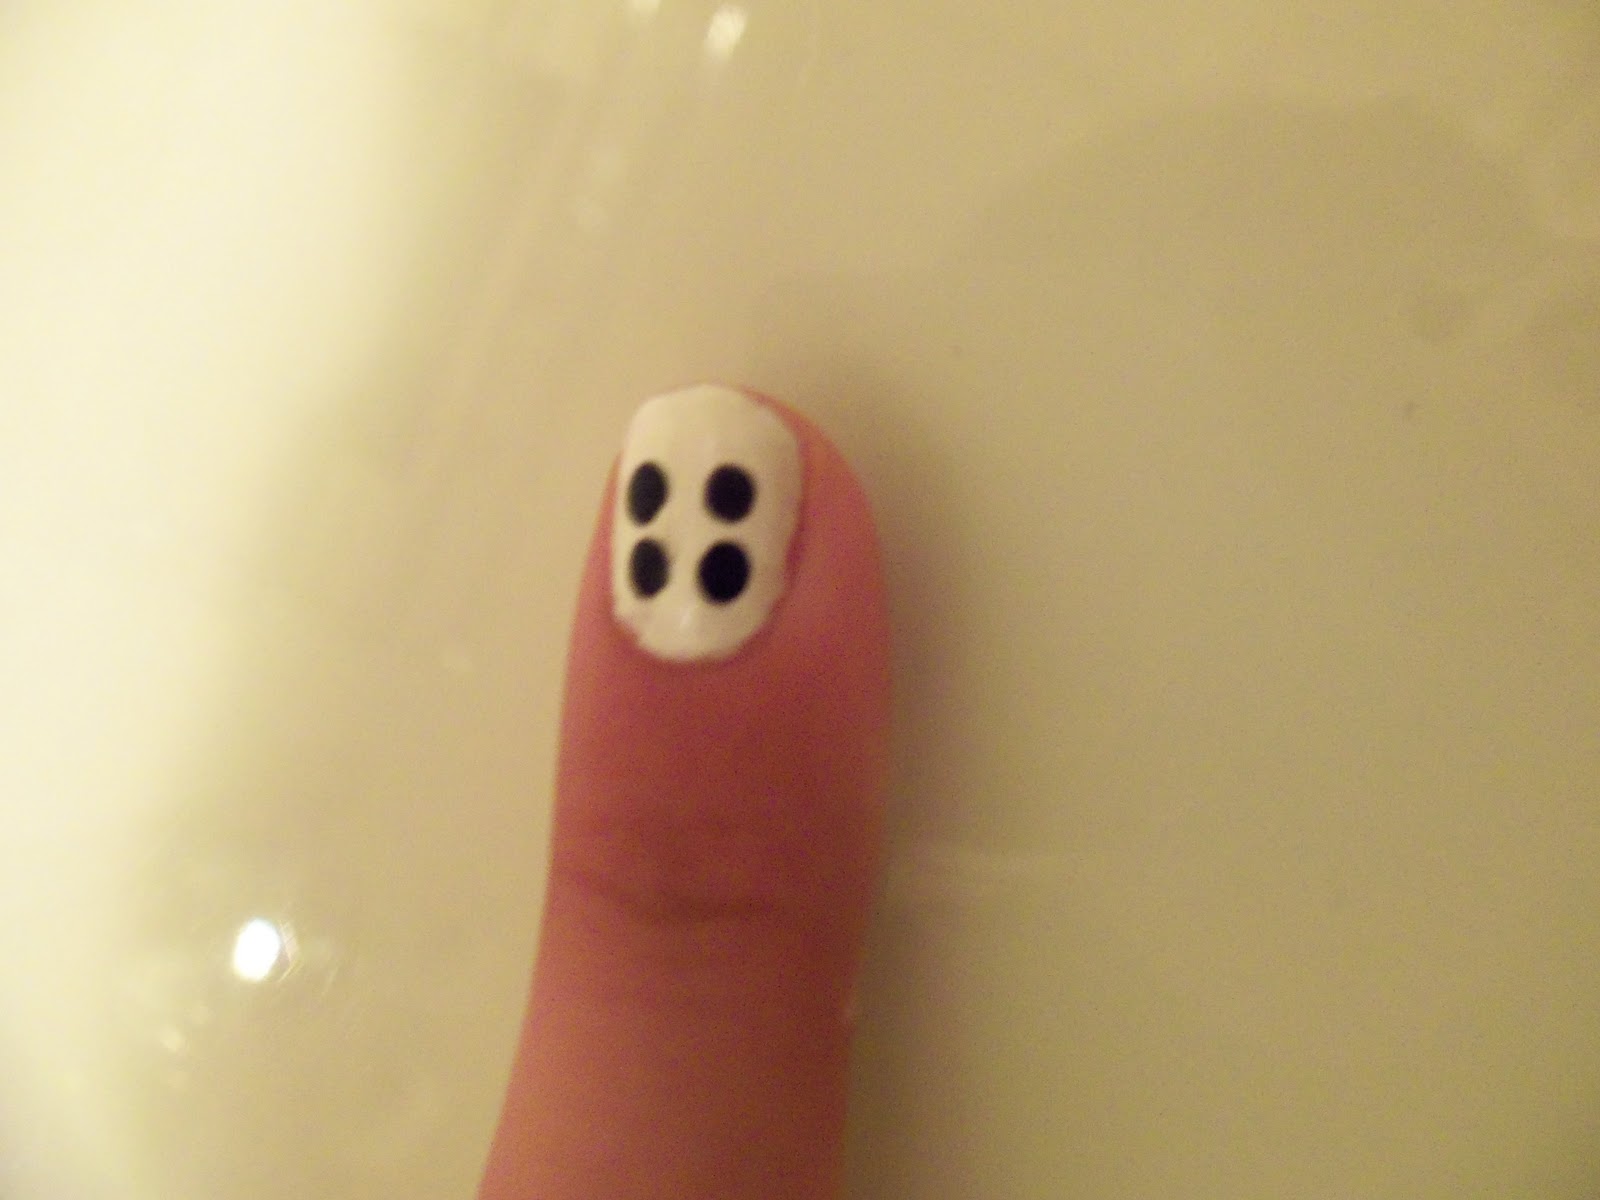 | |
| Dip the dotting tool into the black polish and draw dots onto your nails. |
 |
| Draw dots on each finger and apply a clear coat. |


