Okay, so there's this wonderful little thing called freezer paper... IT ROCKS! It is a versatile paper-like material with a paper side and a plastic-y side. Freezer paper can be used to do many things- from wrapping raw meat to appliques. Today I'm showing you how to use it as a stencil.
Level:
●●○○
Supplies:
- Freezer paper- available @ grocery stores
- print out of image you want to stencil
- fabric paint
- X-acto knife + cutting mat
- pencil
- iron
- foam brush
 |
| First, print out your design in the size you want (in my case a lightning bolt) and place it behind a piece of freezer paper. Using a pencil, trace the image directly onto the paper-y side of the freezer paper. |
 |
| Tip: try to choose a simple image to stencil. Using the X-acto knife, cut out the image as shown in the next pic. |
 |
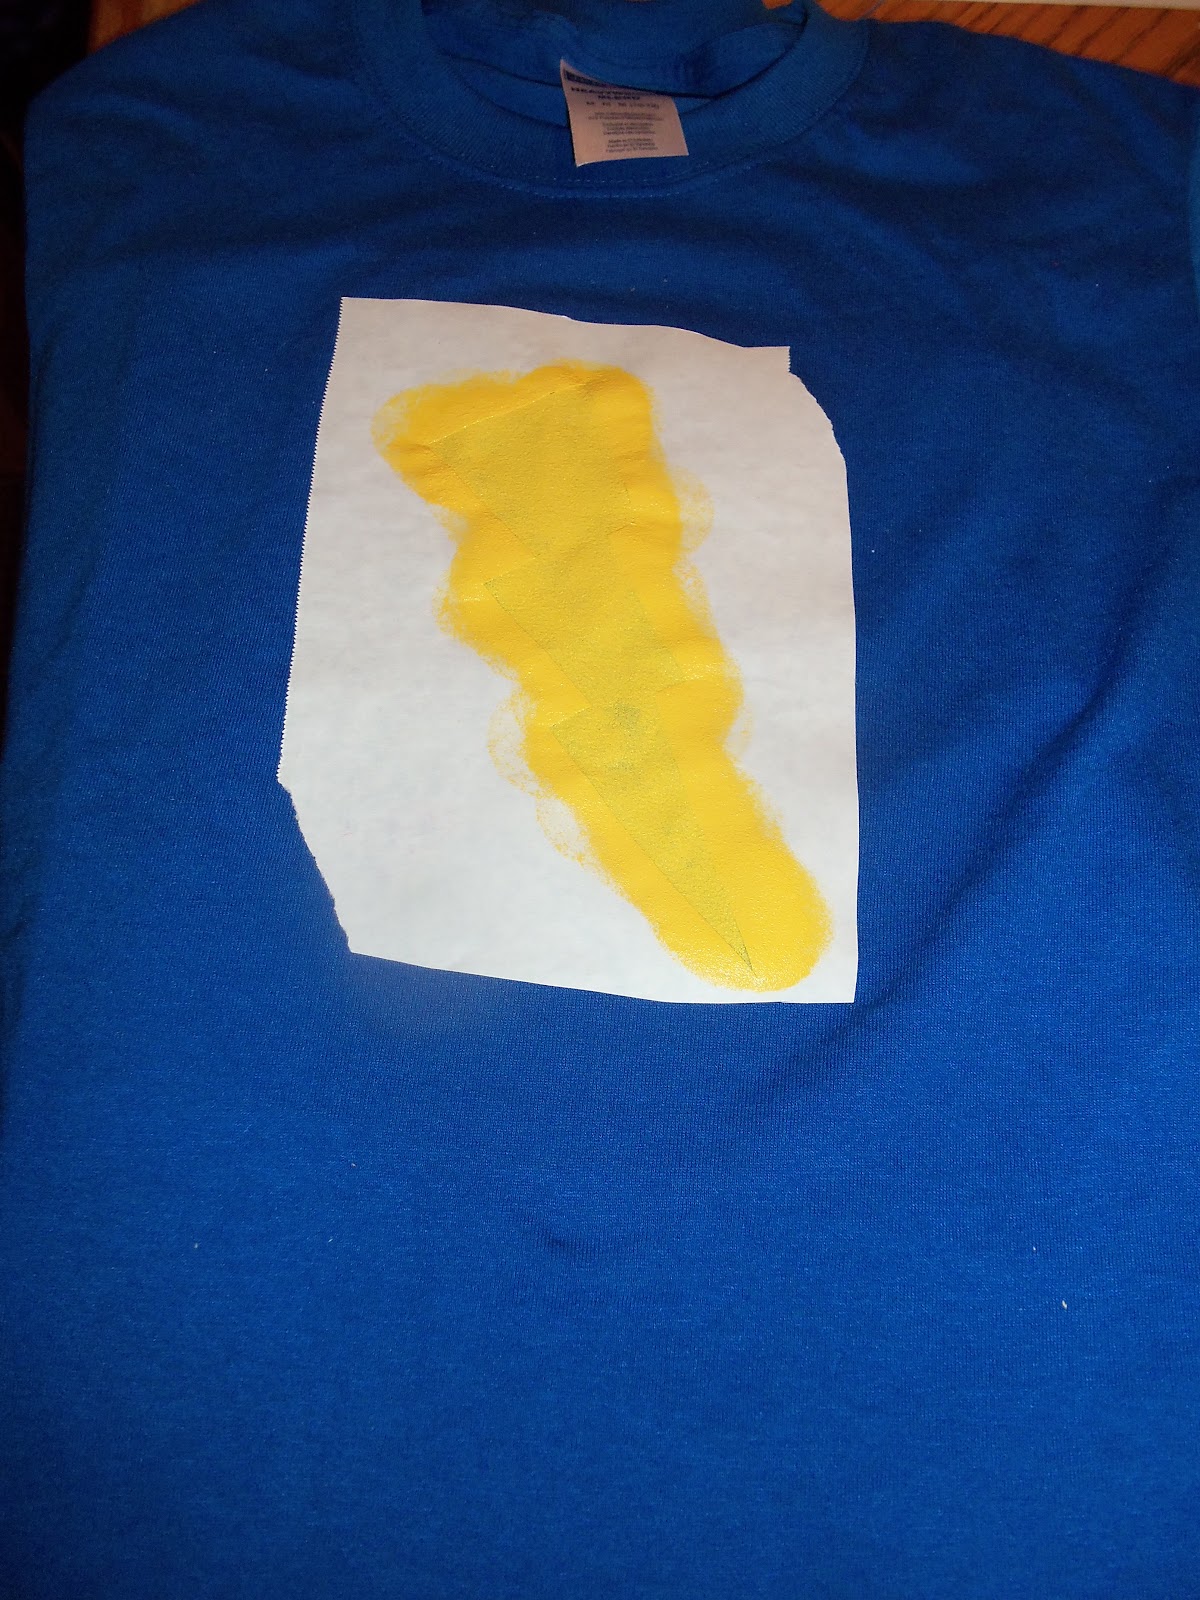
| Place the stencil onto the shirt and iron at medium/high heat. |
 |
| Place a piece of cardboard between both layers of t-shirt so the paint doesn't bleed through. Using a foam brush, paint over the stencil with fabric paint. Don't paint outside the freezer paper. |
 |
| After it's dried, peel the freezer paper off. Let the adventures of Captain Huggy Face begin! |
 |
| To seal your design, place a cloth over design, iron, and wash inside out. |
Pin It Now!


No comments:
Post a Comment